Wednesday, March 31, 2010

Happy One Year Anniversary Love From the Kitchen - Let us Eat Carrot Cake!

Happy 1st Birthday Love From the Kitchen!! I first started this blog one year ago today, with the recipe of Alabama Barbecue Sauce...and look how far I've come now! A lot has happened in the past year! I've tried a lot of new recipes, some I've hated but most all I've liked! I've shared with you lots of family favorites, and I've met a lot of crazy cool people!

Thank you to all my readers who stop by each day to see what I've got cooking, who leave comments (I love comments!!) and who even try my recipes! So here's to another (and more!) year of great food and fun kitchen adventures!!

To celebrate any sort of event, cake is a must, and my one year bloggy anniversary is no exception! I decided that since Easter is only 4 days away carrot cake is a very appropriate way to celebrate!

I found this specific carrot cake recipe over at Allrecipes, a little over a year ago. Last year at Easter time, I was looking for a carrot cake recipe to share at a family gathering and this one seemed to fit the bill. I kind of forgot about it since then, so when I was searching for a carrot cake recipe this year to make for Easter and I stumbled upon this one in my recipe box I knew I had to make it again! It's just too good to not make more than once! This carrot cake is also incredibly easy! What's not to love?!? This is sure to be a hit at any Easter celebration that you head off to this weekend...or any celebration on any weekend for that matter!


Ingredients...

...4 eggs
...1 1/4 c. applesauce
...2 c. sugar
...2 tsp. vanilla
...2 c. flour
...2 tsp. baking soda
...2 tsp. baking powder
...2 tsp. cinnamon
...3 c. grated carrots

Directions...

In a large bowl, wisk together eggs, applesauce, sugar and vanilla. Add in flour, baking soda, baking powder and cinnamon until well incorporated. Lastly, stir in grated carrots. Spread into a greased 9x13 pan and bake at 350 for 40-50 minutes. When cake is done, remove from oven and let cool completely. Using a biscuit cutter or round cookie cutter, cut circles out of the cake and frost. You can split the circles in the middle and add a frosting layer as well, if desired.

Tuesday, March 30, 2010

Homemade Coleslaw

This is the first coleslaw recipe that I had ever tried to make on my own. I first discovered this recipe a year ago over at Allrecipes, but before I started my own search for a recipe I asked around for recipes from "foodie" friends and they all told me to just go to the store and buy the coleslaw mix, because that's what they do. If I wanted to just go buy a coleslaw mix, I wouldn't have bothered asking! This recipe would make a great side dish at any Easter celebration that you have coming up, because honestly, who doesn't love a good salad?

I decided to go with this recipe because it seemed simple, without all the crazy ingredients! It is just a simple coleslaw recipe that pairs well with just about any main dish! I decided that rather than shredding my cabbage, I was just going to chop it into very small chunks. I loved that chunkier feel to the coleslaw, it felt like it had more substance that way! However, when I've made this previously by shredding the cabbage I loved it that way too! This recipe reminds me a lot of that creamy coleslaw that you would get from a resturant off of the salad bar...simple, creamy and delicious!


Ingredients...

...1 head cabbage, shredded
...3 carrots, shredded
...1 c. mayonnaise
...1/3 c. sugar

Directions...

Combine the shredded cabbage and carrots in a large bowl. Set aside. In a small bowl, combine the mayonnaise, sugar and cider vinegar. Pour over the cabbage/carrot mixture and stir until everything is evenly coated. Let refrigerate for several hours before serving.

Monday, March 29, 2010

Skinny Scalloped Potatoes

If you are looking for a great tasting potato recipe to share at your family Easter dinner this weekend then here's your recipe. I'll warn you now though, this recipe is for a "reduced fat" type scalloped potato so it isn't the creamy, ooey, gooey, decadent scalloped potato dish that you are probably used to. It's nice to have a lighter potato recipe, it kind of helps to ring in spring by not eating such heavy, comfort food that we are so used to in the winter.

This dish has really great flavor! The spices are right on and the amount of cheese that is in here is just perfect! I urge you to try this for your Easter dinner this weekend, they won't disappoint!


Ingredients...

...1 chicken boullion cube
...1 1/2 c. water
...1 c. milk
...2 1/2 T. flour
...1/2 tsp. ground bay leaf (if you don't have this basil makes a nice substitution!)
...6 potatoes, peeled
...1/2 c. shredded cheese

Directions...

In a medium saucepan, stir together boullion cube, water, milk and flour over medium heat until thickened (about 5 minutes). Set aside. Slice potatoes into 1/8 inch thick slices and layer half of them onto the bottom of a greased casserole dish. Pour 1/2 of the thickened milk mixture over the potatoes and then layer the remaining potatoes. Pour the rest of the thickened milk mixture over the potatoes. Sprinkle cheese over dish and cover with aluminum foil. Bake at 350 for 30 minutes. Remove foil and bake an additional 15 minutes. Remove from oven and let cool for 15 minutes, allowing the sauce to thicken.

Saturday, March 27, 2010

Sugar Cookie Bars

It's that time of year again! It seems around every holiday, everyone goes sugar cookie crazy and makes dozens upon dozens of cut out cookies, shaped appropriately for the holiday, and then frosts them in bright colors appropriate to the season. Don't get me wrong, I love baking and decorating sugar cookies right along with the next person, but I just don't like the mess of cleanup that comes with it. Plus I have a short attention span, so after about two cookies, I'm done. So going through all the baking prep for cookie decorating is kind of a waste for me, and we don't typically have decorated sugar cookies for holiday's unless someone else makes them for us.

I've finally found a way that we can enjoy the frosting coated sugar cookie without all of the effort. The Sugar Cookie Bar. This is a very dense bar that is basically sugar cookie dough pressed into a pan, baked, cooled and frosted. I was pretty excited to find this recipe over at Real Mom Kitchen because I just knew that this way we wouldn't be shunned from the sugar-cookie-at-holiday-time club. We could still enjoy our sugar cookies (well. you know.) like the rest of society. Even though we should have learned by now that you're supposed to break the mold and not be like everyone else.  

Eh. I guess we are anyways. Not many people get excited over decorating their sugar cookie BARS each holiday. I sense a new holiday tradition coming on...


Ingredients...

...1 c. butter
...1 c. sugar
...2 eggs
...1 tsp. vanilla
...2 1/2 c. flour
...1/2 tsp. salt
...1/4 tsp. baking soda
 
Directions...
 
Place butter in a medium sized bowl. Place in microwave for 1 minute, to melt slightly. Add sugar and wisk together until creamed. Add eggs in one at a time, wisking between each to completely combine. Lastly, wisk in vanilla, set aside. In a large bowl, stir together flour, salt and baking soda. Pour in wet ingredients and stir until everything is well incorporated. Lightly press dough into a well greased 9x13 pan and bake at 375 for 15 minutes. Let cool before frosting.

Friday, March 26, 2010

Lasagna

I did something the other day that I have never in my life done before. I used a recipe off the back of a box. Honestly. I have never used a back of the box recipe before! I don't know what made me do it. Maybe it was because I didn't have all the ingredients for my Mom's Lasagna, but I did for this one. Or maybe it was because I was eager to try something new. Or maybe...it was both.

I can't tell you how this recipe turned out, taste wise, because I gave it to my dad. Much against my husband's will. However, if the smell wafting through my house while this was baking in the oven is any indicator of how good this lasagna is then it is a mighty tasty dish!


Ingredients...


...1 pkg. lasagna noodles
...1 lb. ground meat, browned
...2 eggs, slightly beaten
...2 c. shredded mozzerella cheese
...1 (30) oz. ctr. Cottage Cheese
...1/2 c. grated parmesan cheese
...1 tsp. dried basil
...1 (26 oz.) jar spaghetti sauce
...1 c. water

Directions...

In a medium bowl, combine the cottage cheese, 1 c. of the Mozzerella cheese, 1/4 c. of the Parmesan cheese, eggs and basil. Mix well. In another medium bowl, combine spaghetti sauce, water and ground beef. Mix well. In a 9x13 pan spread 1 1/2 c. of the meat sauce. Cover with lasagna noodles. Spread 1/2 of the cheese mixture over noodles, followed by 1/3 of the meat sauce. Repeat layering once, top with noodles and then remaining sauce. Sprinkle with remaining mozzerella and parmesan cheese. Wrap the pan tightly with foil and bake at 375 for 55-60 minutes. Upon removal from oven, let stand, still covered, for 10 minutes before serving.

Thursday, March 25, 2010

Banana Bread Waffles

I love banana bread and I love waffles. So it made perfect sense to me to find this recipe over at Annie's Eats where the two were married into breakfast bliss. Hubs told me he thought that these tasted like potpourri...how he knows what potpourri tastes like is beyond me! But he could not be more wrong! I think he was just intimidated and thrown off by so many spices in a waffle. The only waffle he's ever known is the plain jane waffle with no spices.

This waffle is soooo delicious! It was such a nice change of pace from the regular waffle, it had a distinct banana bread flavor to it that just warmed me from the inside out! Topped with some maple syrup and banana slices....mmmmmm! Heaven! What a great change in pace to start off the day!


Ingredients...


...4 T. butter, melted
...1 c. plus 2 T. warm milk
...1 tsp. vanilla
...2 c. flour
...1 T. brown sugar
...1 1/2 tsp. yeast
...1/2 tsp. cinnamon
...1/4 tsp. nutmeg
...1/8 tsp. ground clove
...1/8 tsp. ginger
...2 eggs, lightly beaten
...3 ripe bananas, mashed (you know. those ones that are really brown and hanging out in your freezer!)
...2 T. sour cream

Directions...

In a small bowl, wisk together the butter, milk and vanilla. Set the bowl aside, and in a large bowl, combine the flour, brown sugar, yeast and spices. Once the dry ingredients are well combined, stir in the wet ingredients until everything is moistened. Wisk in the egg until it is well incorporated. Cover with the bowl and refrigerate for a minimum of 12 hours and up to 24 hours. When you are ready to cook the waffles, remove from the refrigerator and let sit at room temperature for 30 minutes. This will cause the batter to double in size and have little bubbles on the surface. Stir in the mashed bananas and sour cream, wisking lightly. Cook in a preheated waffle iron until cooked through, about 4 minutes.

To see more delicious recipes for baked goods be sure to check out the Ultimate Recipe Swap going on over at Life as Mom!

Wednesday, March 24, 2010

Crockpot Chicken Cordon Bleu

I have never eaten chicken cordon bleu. Ever. I've heard great things about it, and I've been interested in giving it a try, but it seems that every recipe I've found calls for bleu cheese. I don't like bleu cheese. So I've steered clear. But when I found this particular recipe over at A Year of Slow Cooking that didn't call for even a HINT of bleu cheese, I jumped on it! I mean chicken wrapped around ham and gooey cheese? I'm all over that (have you noticed yet that I really love me some ooey, gooey cheese?)

The sad part? I didn't use presliced cheese. I used block cheese that I sliced myself. Apparently too thick. Because the cheese all melted right out of the chicken and into the sauce. So I couldn't even tell it was there. It was a sad moment when I discovered that. Next time I'll know. Use thin (like paper thin) slices if you want that ooey gooey goodness.

And oh how I long for that ooey gooey goodness!


Ingredients...


...4 boneless, skinless chicken breasts
...4 slices Ham
...4 slices Cheese (I used mozzerella)
...1 can Cream of Chicken Soup
...2 T. milk

Directions...

Prepare your crockpot by greasing the bottom and sides with cooking spray. One at a time, place each chicken breast in a gallon size Ziploc bag and pound thin. Remove from the bag and place 1 slice of ham and 1 slice of cheese on top of each breast. Roll up chicken breast and place seam side down in the crockpot. In a small bowl, wisk together the milk and cream of chicken soup until smooth. Pour mixture over the chicken breasts. Cook on low for 6-7 hours.

Tuesday, March 23, 2010

Patio Potato Salad

I'm a true lover of potato salad. I don't know why I don't make it more often. Maybe because I'm so very used to my Grandma's recipe, which was never written down and was one of those recipes that she just tossed and tasted until it was right. I have yet to get it right. But I'm still pressing on.

I found this particular recipe from Taste of Home. I figure that considering my Grandma owned every issue ever printed of that magazine, it's my best bet for finding something close to her potato salad recipe. I came close with this recipe last summer, but it just wasn't it. Neither was this one. This one was super good though, and if I ever decide to give up on the quest to recreate Grandma's Potato Salad, this will be the one that I stick with (as of right now).

This recipe also marked a first in cooking for me, as I have never made a potato salad that required the "sauce" to be cooked prior to mixing. As far as I knew, all potato salads required just tossing and mixing of ingredients. So it was interesting to try things this way, and I was very pleased with the results!


Ingredients...
You're gonna laugh at this. Really, you will. I had all of the ingredients for this salad staged and ready to photograph...and then halfway through the cooking process I realized that I never actually took the picture. I just staged it. So....my intentions were good but there is no ingredients photo. Sorry!
...1/3 c. Sugar
...1 T. cornstarch
...1 to 1 1/2 tsp. ground mustard
...1/2 tsp. celery salt
...1 tsp. salt
...1/2 c. milk
...1/4 c. vinegar
...1 egg, beaten
...1/3 c. butter
...1/4 c. onion, chopped
...1/4 c. mayonnaise
...7 medium potatoes, peeled and cubed
...3 hard cooked eggs, chopped
Directions...
In a saucepan combine the sugar, cornstarch, ground mustard, salt, celery salt, butter, egg, vinegar and milk. Bring to a boil. Cook and stir for 2 minutes until thickened and bubbly. Cool. Stir in onion and mayonnaise. In a large bowl, combine the potatoes and hard cooked eggs. Add dressing and toss gently to evenly coat everything. Refrigerate, covered, for at least one hour prior to serving.

To see more great recipes, be sure to check out Tuesday's at the Table over at All the Small Stuff, Tempt My Tummy Tuesday over at Blessed with Grace and Tasty Tuesday over at Balancing Beauty and Bedlam!

Monday, March 22, 2010

Healthy Mac & Cheese

We love macaroni and cheese in our house. Correction. HUBS loves macaroni and cheese more than anyone in our house! Serve it with hot dogs and you'll be his best friend for life I tell ya! Typically, macaroni and cheese is my meal to fall back on when I'm not in the mood to cook, because how easy is it to open a box of Kraft Mac & Cheese, boil a few hot dogs and take it easy? Don't deem me a bad wife for serving the blue box...hubs loves it!!

I've decided lately though that it's time to start experimenting with homemade macaroni recipes. Mostly because I'm getting really sick of boxed macaroni. There's only so much of it that a person can eat in their lifetime. Unless, of course, you are my husband. I've made homemade mac and cheese before, but never have found a recipe that I truly loved. I had this recipe saved in my recipe box over at Allrecipes and decided to give it a shot since I had everything in my cupboards.

I personally thought that it turned out kind of bland. It needed some more flavor. Hubs, however, loved it! I just sprinkled some salt on my serving and that seemed to do the trick, so next time I think I'm going to add more salt to the cheese mixture. Plus, this cheese is a little healthier than your typical homemade mac and cheese recipe thanks to the reduced amount of cheese and the addition of cottage cheese! Homemade mac and cheese that the family loves, plus it's healthy?!? Sounds like a winner of a recipe to me!!


Ingredients...


...1 c. fat-free milk
...1 1/4 cs shredded cheddar cheese
...2/3 c. cottage cheese
...pepper to taste
...salt to taste
...2 1/2 c. cooked macaroni
...1 T. onion powder
...paprika to taste
 
Directions...
 
In a food processor, blend the milk, cheeses, salt and pepper until smooth and creamy. Pour into an oven safe casserole dish and add macroni, onion powder and paprika, stirring to evenly coat pasta. Bake at 350 for 30 minutes.

To see more great recipes, be sure to check out Meatless Monday over at My Sweet and Savory!

Saturday, March 20, 2010

Pineapple Carrot Bread

I'm a pretty big quick bread fan. I started out just making Banana Bread, but soon started trying recipes like Zuchinni Bread, Pear Bread (a recipe I've not shared yet, but is delicious!!), and there are many other quick bread recipes that I've bookmarked and am anxious to try! Quick breads are just too easy, not only to make, but also to have on hand for snacks, as a tasty breakfast and even as dessert!

This quick bread recipe, which I got from an acquaintence, really got my attention! Carrot bread seems so very appropriate for this time of year being spring and Easter time and all, but adding pineapple? Now there's a concept I never would have thought of on my own! I knew this was a must try recipe, and now I'm sharing with you that this is a must. try. recipe! This bread is so moist and delicious! It reminds me a lot of carrot cake, but with that extra addition of fruity pineapple really kicks it up a notch! This bread is super great warm, fresh from the oven with a little butter on it, and because I can't eat it that way every time (isn't it so sad that food can't stay warm fresh from the oven all the time?) I have a tendency to toss a slice in the microwave for 20 seconds at a time or so to sort of mimick that warm from the oven taste. It does the trick well enough to satisfy me :)


Ingredients...


...3 cups all-purpose flour

...1 tsp. salt
...1 tsp. baking soda
...1 tsp. ground cinnamon
...3 eggs
...2 c. sugar
...3/4 c. applesauce
...1 c. shredded carrots
...1 (8 ounce) can crushed pineapple, undrained
...2 tsp. vanilla extract

Directions...

In a large mixing bowl, combine flour, salt, baking soda and cinnamon. In a seperate mixing bowl, wisk together eggs, sugar and applesauce until well combined. Then add in carrots, pineapple and vanilla. Add wet ingredients to the dry ingredients and stir until everything is wet and well combined. Pour batter into two greased loaf pans and bake at 350 for 45 minutes, or until a toothpick inserted in the loaf comes out clean.

Friday, March 19, 2010

Cinnamon Applesauce

As a child I always marveled over the pink applesauce on the grocery store shelves, but mom would never let us buy it. She said it was plain applesauce or none. I'm not really sure on her reasoning behind that...

So when I found this recipe in a Taste of Home cookbook I decided to whip up a batch. I should take a side street here and mention that I can no longer stand store boughten applesauce of any kind. I had a jar in my refrigerator a few weeks back and poured some to go with my lunch and I just wasn't satisfied. I guess once you go homemade you just can't go back. So I guess I have no idea how this version of homemade "pink" applesauce compares to the boughten kind...but I'm guessing it's probably better.

I was pleasantly surprised by how the red hots weren't "hot" once they were cooked into the applesauce. Only a nice cinnamon flavor shone through. And of course the pink color. This applesauce is a great change of pace from the regular stuff, and what a fun twist, being pink and all!


Ingredients...


...8 tart apples, peeled and quartered
...1 c. water
...1 c. sugar
...1/4 c. red hot candies

Directions...

Place apples and water in a large saucepan. Cover and simmer for 20 minutes. Mash apples once simmering is completed, and stir in sugar and red hots over heat until both are well disolved.

To see more delicious recipes, be sure to check out Friday Food over at Mom Trends, the Recipe Swap going on over at And Baby Makes Five, Foodie Friday over at Designs by Gollum and Food on Fridays over at Anne Kroeker!

Thursday, March 18, 2010

Tangy Cranberry Pork Chops

I have had a lonely can of whole cranberries sitting in my cupboard ever since Thanksgiving. I've actually been really eager to use them in something, because I really do enjoy cranberries, but it seems that every recipe that I've found calling for them also calls for a meeelion other ingredients that I don't have on hand, so I'd end up buying all kinds of stuff just to use up that one stinkin' can!

While flipping through a Quick Cooking cookbook the other day, I found this recipe and decided to give it a go since I had everything on hand, and had actually been wanting to prepare pork chops for supper anyways sometime soon.

I was really happy with how this recipe turned out! I was really nervous that the catalina dressing wouldn't pair well with the cranberry sauce, and even breifly considered leaving it out. I thought better of it though, and just (sort of) followed the recipe like a good little girl. I'm glad I did, because I'm sure this would not have been nearly as good with the cranberries on their own...

I will warn you, however, that this recipe makes waaaay more sauce than you'll need for the recomended 4 chops. So I urge you to either make mashed potatoes with this, and use the leftover sauce as a gravy, or scale back how much sauce you make...by like half.


Ingredients...


...4 boneless pork chops
...1 T. vegetable oil
...1 can whole berry cranberry sauce
...1 c. catalina salad dressing
...4 tsp. dry onion soup mix

Directions...

In a large skillet, cook pork chops in vegetable oil for 15 minutes per side, until no longer pink in the middle and the juices run clear. In a large, microwave safe, bowl combine the remaining ingredients. Cover and microwave on high until heated through, about 3 minutes. Cover chops with sauce before serving.

To see more great recipes, be sure to check out the Ultimate Recipe Swap going on over at Life as Mom and the Recipe Swap going on over at The Grocery Cart Challenge!

Wednesday, March 17, 2010

Irish Lamb Stew

Happy St. Patrick's Day! I'm by no means Irish, and I don't even really enjoy "pretending" to be Irish around the holiday, but I do love me some Irish Lamb Stew! I attended college in a very small, very Irish town, and St. Patricks Day was a bigger deal than any other day of the year! Actually, the weekend before St. Patty's Day was the biggest deal of the year, but you get the picture  :) Anyways, my first year living in this small Irish town, I worked as a waitress in an Irish Pub located inside the casino in town. One of our menu specialities was Irish Lamb Stew. For the first portion of my employment there, I was scared to try this stew. The whole "lamb" thing kind freaked me out. I'd never eaten lamb before! One night, I was tired of eating the same thing day in and day out so I decided to give this stew a try! Mmmmm! It was love at first taste! This stew was so thick and rich! The meat and veggies were in large chunks and the seasonings were spot on!

I was the only server there that liked the stuff! I really wanted to recreate that recipe on my own, with the exception of using lamb, as I don't have access to any around here, just beef. I didn't really succeed in creating an exact replica of said stew, but I did created a mighty great tasting alternative! This stew wasn't as thick, I think the "sauce" needs work, and I chose to chop the veggies and meat into smaller, bite size, chunks.

I found this recipe over at Allrecipes and it reminded me a lot of my crockpot beef stew recipe that I already make (and apparently haven't shared with you, shame on me!), with a few changes. To make it "Irish" I suppose. I'm going to continue to make this recipe and play around with it a bit. I really want to try and get the thicker, rich sauce like the first Irish Stew I ever tried!


Ingredients...


...1/2 lb. bacon, cooked and diced
...3 lb. of steak or roast, cut into 2 inch pieces (or lamb, to be traditional)
...1/4 tsp. salt (not pictured)
...1/4 tsp. ground black pepper
...1/4 c. flour
...1 tsp. garlic powder
...1 large onion, chopped
...1/4 c. water
...2 c. beef broth (I used 2 cups of water and 2 beef boullion cubes)
...2 T. sugar (not pictured)
...2 c. carrots, sliced
...2 c. celery, sliced
...4 potatoes, peeled and cubed
...1/2 tsp. dried thyme
...1 bay leaf
...1 c. water (or you can use white wine in place of this water)
 
Directions...
 
Coat steak/roast/lamb (whatever you choose to use) with salt, pepper and flour. Place in a skillet with some oil and cook until meat is cooked through. Place in greased slow cooker. Add remaining ingredients and stir well to mix ingredients and evenly distribute spices. Cook on low for 6-8 hours.

To see more great crockpot recipes, be sure to check out Crockpot Wednesday over at Dining with Debbie!

Tuesday, March 16, 2010

Irish Soda Bread

St. Patricks Day is tomorrow, do you have your Irish meal all ready to celebrate? I shared a most delicious cupcake recipe that is in no way, shape or form Irish, on Saturday, and now I've made some Irish Soda bread. This bread would make a great side to the dish that I've made for tomorrow...Irish Lamb Stew...yum!

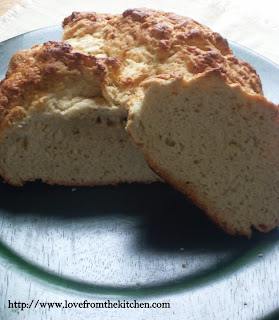
This bread was...different. It appears to be a yeast bread, but it is actually a quick bread. It also appears to have the density of a yeast bread, but it actually eerily reminds me of cornbread. Very much so. It also doesn't bake up "pretty". As you can see in the picture, it's a pretty lumpy loaf of bread. Now, I realize that you're just going to slice it up and slather it in butter, so looks don't really matter, but I'm just weird like that. I like my loaves of bread to be smooth and pretty :)

Despite the lack of "pretty" in this loaf of bread, it really did taste very good. Once you get used to the cornbread consistency, this bread is quite enjoyable! Next time, I think I'm going to try and make this bread in loaf pans though. While the round loaf is fun and different, it makes for some really hu-uge long slices of bread! I found this recipe over at Allrecipes and was very eager to try it! You should whip up a loaf or two for St. Patricks Day, it's always fun to celebrate a holiday with the appropriate foods! 


Ingredients...

...4 c. flour
...4 T. sugar (not pictured)
...1 tsp. baking soda
...1 T. baking powder
...1/2 tsp. salt (not pictured)
...1/2 c. butter, softened
...1 c. buttermilk (I made my own by adding 1 T. lemon juice to 1 c. regular milk)
...1 egg

Directions...

In a large bowl, stir together the flour, sugar, baking soda, baking powder and salt. Stir to evenly distribute all ingredients. Cut in softened butter. Stir in buttermilk and egg until all ingredients are moistened. Knead dough lightly until everything is evenly incorporated. Shape dough into a round loaf and place on a lightly greased baking sheet. Cut an "x" in the top of the loaf and brush with milk and butter if desired. Bake at 375 for 30-45 minutes. 

To see other really great recipes, be sure to check out Tuesday's at the Table over at All the Small Stuff, Tempt My Tummy Tuesday over at BlessedwithGrace and Tasty Tuesday over at Beauty and Bedlam!

Saturday, March 13, 2010

Thin Mint Cupcakes

I'm typically not a huge mint fan, but when it comes to Girl Scout Thin Mint cookies I just can't get enough! I ordered two boxes this year, and then instantly regretted it. Two boxes of Thin Mints sitting in my cupboard? Do you know how hard it is to resist eating them ALL myself?!?!? 

Must.

Show.

Restraint.

In all honesty though, I'm very proud of myself. In the first week of having these two boxes of cookies in my posession only 1 sleeve of cookies disappeared. With the exception of the 1/2 3/4 sleeve that I used in this recipe. So I guess that means that almost a whole box disappeared in the first week. But only half of that box was because I ate them. How's that for restraint!

I found the concept for these cupcakes over at Real Mom Kitchen (she just has the best recipe ideas, doesn't she?!?) and decided to run with it. You have two options here, you can either use a box cake mix (which I did. mostly because I have 20 some boxes of cake mix in my stockpile, so why not, right?)  or you can make your own homemade cupcakes. I am also going to mention that this frosting recipe didn't work out for me. I wish better luck to you. I was hoping for a fluffy frosting that I could pipe onto these cupcakes. I somehow managed to create frosting water, despite that I followed the recipe exact. It actually tasted fab and I totally fell in love with the way it drizzled down the sides so for this time, I was 110% content with what should have been considered a flop. Someday I'll figure out how to make amazing frosting...

Someday.


Ingredients...

Cupcakes...


...1 boxed cake mix
...1/2 sleeve of Thin Mint cookies (I used 3/4 sleeve)

Prepare cake mix according to package directions. Crush cookies and stir into batter. Bake according to package directions.

Frosting...


...2 c. powdered sugar
...3 oz. cream cheese, softened
...1/2 c. butter, softened
...1/4 c. milk
...1 tsp. vanilla

Beat cream cheese and butter on low speed until well mixed and there are no lumps. Slowly add powdered sugar and continue beating on low, switching to medium speed. Add in milk and vanilla and beat on medium speed until well combined. Add food coloring until desired shade of green is reached.

Friday, March 12, 2010

Banana Nut Muffins

Remember a few weeks ago when I was craving what I thought to be an apple muffin? Well, I learned with that recipe that maybe it wasn't an apple muffin I was craving at all. So I kept at making muffins until I discovered that what I was actually craving was a moist, chewy banana nut muffin. Yep. Not exactly apple muffins.

Darn you, pregnancy cravings. Why can't you be more clear?

You know those monster muffins that they sell at Perkins? The ones that you just know are so calorie laden that you shouldn't even look at them for fear of what will happen to your hips. But you still order one anyways and then proceed to enjoy every last crumb. Yeah...that's what I wanted. Minus all the calories.

Is it really possible to get the best of both worlds? Why yes. Yes it is.

I found this recipe in my trusty ol' hometown church cookbook and this recipe alone just goes to prove that little ol' church ladies really do know what they're talking about when it comes to making a tasty dish!


Ingredients...


...1 c. flour
...1/2 c. sugar
...2 1/2 tsp. baking powder
...1/2 tsp. salt
...3/4 c. quick oatmeal
...1/3 c. nuts (I used cashews and crushed them up)
...1 egg
...3 T. oil
...1/2 c. milk
...1/4 tsp. baking soda
...1/2 c. mashed bananas

Directions...

Mix together flour, sugar, salt, baking powder, baking soda, nuts and oatmeal. In a seperate bowl, beat the eggs and then stir in the milk and oil. Add to the dry ingredients and then stir in the bananas. Stir only until the dry ingredeints are moistened. Spoon batter into muffin cups, filling them 2/3 full. Bake at 400 for 20 minutes.

To see more great recipes, be sure to check out Friday's at the Table over at And Baby Makes Five, Foodie Friday's over at Designs by Gollum and Food on Friday's over at Anne Kroeker!

Thursday, March 11, 2010

Bubble Pizza

This is an interesting take on pizza night. I actually quite enjoy it! Pizza in casserole form! This recipe is an old family favorite, we had this a lot growing up and I have loved it ever since. It seems like lately I've been falling back on a lot of old family favorites, mostly because they are all quick and easy...which is nice on busy nights when I'm too tired to cook when I get home from work (which, considering that I am in my third trimester, seems to be quite often lately...). I also like dishes like this because I can prepare them ahead of time and then just toss them in the oven when I get home and go about other things around the house. Like cleaning.

Except 9 times out of 10 I don't go about cleaning. I go about sitting in the chair with a mug of hot cocoa and watching Friends reruns until the oven timer goes off. And pray the whole while that hubs will offer to do the dishes. One of these nights he will make that offer....I hope...


Ingredients...


...1 lb. ground meat
...2 tubes refrigerator biscuits
...1/2 jar Ragu Sauce
...1/2 green pepper, chopped
...1/2 onion, chopped
...1 can sliced mushrooms, drained
...Pepperoni slices, you choose how many you want
...1 c. shredded cheese

Directions...

Brown the ground meat with the peppers and onions until meat is no longer pink. Drain. Combine in a large mixing bowl with all remaining ingredients and spread in a greased 9x13 casserole dish. Bake at 350 for 30 minutes.

To see more great recipes, be sure to check out the Ultimate Recipe Swap going on over at Life as Mom and the Recipe Swap going on over at The Grocery Cart Challenge!

Wednesday, March 10, 2010

Slow Cooked Vegetable Beef Soup

Ohmygosh! Why did it take me sooo long to make my own Vegetable Beef soup?!?!? If that doesn't give you any tips as to how good this soup is, then let me spell it out for you.

This. Soup. Is. Amazing.

End of story.

I started this soup in the morning, and then taste tested it before I went to work for the afternoon...I seriously didn't want to go to work after I tested it. I just wanted to sit at home all afternoon and eat this soup. I was practically giddy all afternoon at work, just thinking about this soup simmering away in the slow cooker at home, awaiting my arrival. The wait to eat this for supper was worth every. last. minute. YUUMMMMM!!! The seasonings and spices are right on, the consistency is perfect, and the combination of everything together is just heaven. Heaven in a bowl. Perhaps we should rename this...

I bet you can't guess where I got this recipe from either (wink, wink). Surely enough...Taste of Home's Slow Cooker Favorites cookbook. I've sang my praises about Taste of Home before, and I'll sing them again. I love Taste of Home. Probably just about as much as I love this soup! The recipes are so down home delicious and easy. I mean, you just can't beat chopping some stuff up and tossing it in the slow cooker for 8 hours while you go out and enjoy yourself, then coming home to a fully prepared dinner! It's like you have your own maid or chef or something slaving at the stove all day for you!


Ingredients...
...1 lb. steak, cut into cubes
...1 can diced tomatoes, undrained
...3 c. water
...2-3 potatoes, peeled and cubed
...1 onion, diced
...3 celery ribs, sliced
...3 carrots, sliced
...3 beef bouillon cubes
...1/2 tsp. dried basil
...1/2 tsp. dried oregano
...1/2 tsp. salt
...1/4 tsp. pepper
...1 pkg. frozen mixed vegetables

Directions...

Combine the first 12 ingredients in your slow cooker. Cook on high for 6 hours. Add frozen vegetables and cook an additional 2 hours on high.

To see more great crockpot recipes be sure to check out Crockpot Wednesday over at Dining with Debbie!

Tuesday, March 9, 2010

Hamburger Rice Dish

This recipe was my mom's. I don't remember her making it a single once while we were growing up, but I found the recipe card written out in her distinct handwriting in a recipe box one day, so I know that at some point she made it for us and liked it. Truthfully though, this is basically homemade Hamburger Helper. Nothing fancy, pretty basic. In all of it's simplicity however, it was quite delicious. Beats the box off any Hamburger Helper any day. Probably cheaper too, and faster. I'll take it...


Ingredients...


...1 lb. ground meat
...1 can cream of mushroom soup
...1 can cream of chicken soup
...1 c. water
...2 Tbsp. worcestershire sauce
...1 c. instant rice
...1 c. celery (not pictured, sorry!)
...1/2 cup onion, chopped

Directions...

Combine all ingredients in an oven safe casserole dish and bake at 350 for 40 minutes.

To see more great recipes, be sure to check out Tempt My Tummy Tuesday over at Blessed with Grace, Tuesdays at the Table over at All the Smal Stuff and Tasty Tuesday over at Beauty and Bedlam!

Saturday, March 6, 2010

Neiman Marcus' $250 Cookie Recipe

I'm sure you've all heard the story behind the name of these cookies. It's an age old tale told over glasses of milk served with these cookies. Just in case though, here's my shortened version.

Woman enters resturant. Woman orders cookie. Woman gets charged $250 for said cookie. The end.

The real story is much more interesting. I'm just not a good storyteller. Which is sad considering that I'm a two year old teacher at a daycare. My poor students. I think I'll console myself though by telling you that it's not a true story. Just a myth. So I can be just a bad myth teller, right?

You can find this recipe just about anywhere. It's all over the internet and is included in most every cookbook on the shelves. The particular recipe that I referenced was found in a local hometown church cookbook. I had never had one of these cookies before, but figured I'd better make a batch to see what all the fuss was about and I must say that this is a really. good. cookie.

I don't know that I'd pay $250 for just one of these bad boys, but that's besides the point...


Ingredients...
...1 c. butter
...1 c. sugar
...1 c. brown sugar
...2 eggs
...1 tsp. vanilla
...2 c. flour
...2 1/2 c. blended oatmeal (place oatmeal in blender or food processor and process until it reaches a fine powder)
...1/2 tsp. salt
...1 tsp. baking powder
...1 tsp. baking soda
...12 oz. chocolate chips
...1/2 chocolate bar, grated (4 oz.)
...1 1/2 c. chopped nuts (I used cashews)
Directions...
Cream butter and both sugars. Add eggs and vanilla. In a large bowl, combine the flour, oatmeal, salt, baking powder and baking soda. Stir in wet mixture. Add chocolate chips, grated chocolate bar and nuts. Roll into balls and place on a baking sheet. Bake at 375 for 8-10 minutes.

To see more great recipes, be sure to check out Mouthwatering Monday over at A Southern Fairy Tale!

Friday, March 5, 2010

Tuna Burgers

This is a story of the misfortunate tuna burgers. Which hubs was leery about. Ever since I made carrot burgers two years ago, he is skeptical of any recipe that is titled "____ Burger". Especially when ground beef isn't the main ingredient.

Well, I guess I failed him again. I'm pretty sure after this tuna burger fiasco he will never again eat anything entitled "____ Burger". The first recipe, for Carrot Burgers...not my fault. The recipe was just rotten and I was attempting to be frugal with a meatless meal. This recipe...okay, kinda my fault. No, totally my fault. Because I made a substitution. And when hubs found out that bit of information he responded with "why do you do that?" I guess that means I make too many substitutions for the sake of frugality. Maybe I should stop that.

I found this recipe in one of the cookbooks I got from the cleaning out of my grandma's house, and I'm sure that as written, this recipe is quite tasty. Maybe even downright good. Just don't make a substitution like I did.

Don't do it!!!


Ingredients...

...1 can tuna
...3/4 c. salad dressing (this is where I messed up. I read it as actual salad dressing. Upon reviewing the recipe after eating this disaster, I realized that they probably meant the mayonnaise like salad dressing. Yeah. Use the mayonaise. Not actual salad dressing. ESPECIALLY not 3 Cheese Ranch Dressing. Don't buy that stuff, ever. BLECH!!)
...1/2 c. diced pickles
...1 c. shredded cheese
Directions...
Mix together all ingredients and spread on a slice of bread. Spread a second slice with butter. Place on a baking sheet and place under broiler until tops are browned and cheese is melted.

To see more great Recipes be sure to check out Colleen's Kitchen Recipe Swap over at And Baby Makes Five, Foodie Fridays over at Designs by Gollum, Food on Fridays over at Anne Kroeker and Friday Food over at MomTrends!

Thursday, March 4, 2010

Sour Cream Rolls

I have a confession to make. Back in September my mother in law found a KitchenAid stand mixer at a garage sale at a GREAT price, and picked it up for me, knowing that I wanted one in the worst way. Here's the confession.

It took me until a week ago to use it for the first time.

*runs and hides in the corner shamefully*

I mean, it's not like it was hidden in a cupboard for those 6 months and I forgot about it. No, no. It was sitting on my kitchen counter in all of it's glory. Unused. I don't know what finally posessed me to use it. Actually, I do. It was this recipe. I found this recipe over at Real Mom Kitchen, and she mentioned that she used her KitchenAid to do the kneading for her. I was dumbfounded.

You mean I've had this thing for 6 months, and haven't used it to aid with bread making?!? What have I been doing, hiding under a rock?!?!?!?!?

This roll recipe was phenomenal! I couildn't decide between making this one for the first time, or repeating the wonderful Pumpkin Roll recipe that I discovered at Thanksgiving. I opted to try this one, because I love rolls and like experimenting with new roll recipes. I'm so glad I opted for something new, because even though the Pumpkin Rolls just may be my favorite food, EVER, this roll was super great!!


Ingredients...
...2 1/2 - 3 c. flour (I used more than this. Use your best judgement)
...2 T. sugar
...2 1/4 tsp. yeast
...1 tsp. salt
...1 c. sour cream
...1/4 c. water
...3 T. butter (divided)
...1 egg

Directions...

In a large bowl, combine 1 1/2 c. of the flour, sugar, yeast and salt. In a small saucepan over medium-low heat, combine the sour cream, water and 2 T. of the butter until it reaches 120-130 degrees and then add to the dry ingredients. Place in KitchenAid mixer and beat on medium speed for 2 minutes. Add the egg and 1/2 cup more of the flour, beat for 2 minutes more. Slowly add remaining flour a little bit at a time until a soft dough forms and the dough pulls away from the side of the mixing bowl. Let mix on low to medium speed for 6-8 minutes. Place in a greased bowl (be sure to turn the dough over so it is also greased), cover and let rise in a warm, draft free spot for 1 hour. Punch down dough, and let rest on a floured surface for 5 minutes. Divide into 12 pieces. Place each piece into a ball and into a greased 9x13 pan. Cover and let rise in a warm place for 30 minutes, until the dough is doubled. Bake at 375 for 20 minutes. After the first 10 minutes, cover pan with aluminum foil to keep the rolls from getting too browned on the top. Melt remaining 1 T. of butter and brush onto the top of the rolls and remove from the pan to cool.

To see more great recipes, be sure to check out the Recipe Swap going on over at Life as Mom and the Recipe Swap going on over at Grocery Cart Challenge!

Wednesday, March 3, 2010

Salisbury Steak

I don't know what it is about salisbury steak, but I just can't make it. I tried about a month ago, and screwed it up in the beginning stages so I ended up tossing it, I think. So I decided to give it another go, this time with a different recipe. One that I found in one of the cookbook's of my grandma's that I recieved when we cleaned out her house. I still wasn't impressed. The ground meat crumbled up in the pan, making it hard to flip and cook and such. I also wasn't impressed because it basically tasted like meatloaf. But with a lot more effort on my part to make it.


Ingredients...


...1 lb. ground meat
...1 can cream of mushroom soup
...1/3 cup water
...1 egg, slightly beaten
...1/2 c. bread crumbs
...1/4 c. cup onion, chopped

Directions...

Combine 1/4 c. soup with egg, bread crumbs, meat and onion. Mix thoroughly. Shape into patties and brown in a skillet. In a small bowl, combine remaining soup with water and pour over patties in skillet. Cover and simmer 20 minutes, stirring often to avoid a burnt mess on the bottom of your pan.

Tuesday, March 2, 2010

No Fuss Potato Soup

I feel like I make potato soup all the time. This is like, what, the third recipe I've shared for potato soup now?!? What can I say, I love the stuff! When I was growing up, we rarely had homemade soup. The only soup I knew came from a can...sad, I know. I remember when I reached junior high age, my mom graduated me from canned chicken noodle or tomato soup to canned potato soup...I was obsessed! I loved the stuff! I always felt so "grown up" eating potato soup while my younger sisters munched on chicken noodle. Yep, I was kind of a loser like that ;)

So that explains my obsession with making potato soup. And I guess that explains why when I found (another) new recipe for it in my trusty Taste of Home Slow Cooker Favorites cookbook, I just had to give it a try! I think this *might* be my favorite version yet!


Ingredients...


...6 c. cubed, peeled potatoes
...5 c. water
...2 c. chopped onion
...1/2 c. chopped celery
...1/2 c. sliced carrots
...1/4 c. butter
...2-3 chicken boullion cubes
...2 tsp. salt
...1/4 tsp. pepper
...1 can evaporated milk

Directions...

In a large slow cooker, combine all the ingredients except for the evaporated milk. Cook on high for 8 hours. Add milk, stirring well. Cook an additional 30-60 minutes, until heated through.

To see more great recipes, be sure to check out Tempt my Tummy Tuesday over at Blessed with Grace, Tuesday's at the Table over at All the Small Stuff, Tasty Tuesday over at Beauty and Bedlam and Crockpot Wednesday over at Dining with Debbie!
Related Posts with Thumbnails