For more great recipes, be sure to ceck out Mouthwatering Monday!
Monday, February 14, 2011
Chocolate Eclair Cake
For more great recipes, be sure to ceck out Mouthwatering Monday!
Saturday, March 6, 2010
Neiman Marcus' $250 Cookie Recipe
Woman enters resturant. Woman orders cookie. Woman gets charged $250 for said cookie. The end.
The real story is much more interesting. I'm just not a good storyteller. Which is sad considering that I'm a two year old teacher at a daycare. My poor students. I think I'll console myself though by telling you that it's not a true story. Just a myth. So I can be just a bad myth teller, right?
You can find this recipe just about anywhere. It's all over the internet and is included in most every cookbook on the shelves. The particular recipe that I referenced was found in a local hometown church cookbook. I had never had one of these cookies before, but figured I'd better make a batch to see what all the fuss was about and I must say that this is a really. good. cookie.
I don't know that I'd pay $250 for just one of these bad boys, but that's besides the point...

To see more great recipes, be sure to check out Mouthwatering Monday over at A Southern Fairy Tale!
Saturday, January 30, 2010
Louise's Bars are Better Bars
Plus, it's really fun to tell the people the bar's name...and then watch them stop mid bite as if digesting the information they've just been presented with.

 ...1 c. flour
...1 c. oatmeal
...3/4 c. brown sugar
...1 stick butter
...1 can sweetened condensed milk
...1 pkg. chocolate chips
Combine flour, oatmeal, brown sugar and buter until well mixed. Reserve 1 cup and spread remaining mixture on bottom of 9x13 cake pan and bake at 350 for 10 minutes. Pour can of sweetened condensed milk over the baked mixture, and then top with chocolate chips and remaining oatmeal mixture. Return to oven and bake an additional 15-20 minutes.
Friday, January 1, 2010
Chocolate Pumpkin Muffins
Just don't judge me if I choose to add some chocolate frosting...
These muffins/cupcakes are really moist. Almost too moist. They fell apart very easily, and didn't cut in two as easily as I please for a muffin to for buttering purposes. But ohhhh was it sooo goooodd!!
Alright. I give. Eat these for breakfast. Every. Day. Because they're good. And if you need a cupcake recipe too, then these will do.
Let's just call these the Chocolate Pumpkin Cupcake Muffin and call it good.

 ...1 chocoalte cake mix
...1 can pumpkin
...2 eggs
...1 tsp. cinnamon
...1 tsp. vanilla
Combine all ingredients in a large bowl until well combined and there are no dry pieces left. Spoon batter into greased muffin tins and bake at 350 for 20 minutes.
Wednesday, December 23, 2009
Layered Chocolate Pie Dessert
At least that's what I told myself...
Because over the holidays calories don't count :)
And because I'm 5 months pregnant, so that kind of thing is acceptable ;)

 Crust:
...2 c. flour
...1 1/2 sticks butter
...1/2 c. nuts (I used chopped pecans, and they're not pictured)
Mix all three ingredients together and lightly press into the bottom of a greased 9x13 pan. Bake at 350 for 20 minutes. Allow to cool completely.
Filling:
...8 oz. cream cheese (at room temperature)
...1 c. powdered sugar
...1/2 tub Cool Whip
Mix these three ingredients together and spread over top of the cooled crust.
Pudding:
...2 (3 oz) boxes of chocolate pudding mix
...3 c. milk
Mix pudding and milk together according to package directions. Spread over the cream cheese layer.
Topping:
...1 tub Cool Whip
...Crushed Reeses Peanut Butter Cups (or nuts, shaved chocolate...anything goes really)
Spread Cool Whip over pudding layer and then sprinkle crushed (insert what you're using here) over the Cool Whip. Refrigerate until serving time.
Tuesday, December 22, 2009
Chocolate Peanut Clusters

 ...1 pound of chocolate (again, I used Hershey's Kisses because it's what I had on hand. You can use chocolate chips or baking chocolate as well!)
...2 T. shortening
...peanuts
Melt chocolate in the microwave and then stir in shortening until smooth. Add in peanuts until the mixture is the consisstency you like. You can really make these however you want, more chocolate, more peanuts or an equal amount of each. Just keep adding peanuts until it is how you want it. Drop by spoonfuls onto waxed paper to harden.
To see more delicious recipes check out Tasty Tuesday over at Balancing Beauty and Bedlam and Tempt my Tummy Tuesday over at Blessed with Grace.
Friday, December 18, 2009
Chocolate Peanut Butter Fudge
Okay, I lied.
It was a little intimidating.
But that was only before I learned what soft ball meant. Once I learned that candy making phrase and it's meaning it wasn't so much intimidating anymore.


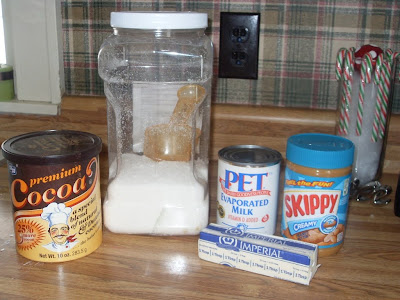
...3 cups white sugar
...1 cup evaporated milk
...1/4 cup cocoa
...1/2 cup peanut butter
...1 T. butter
In a saucepan stir together the sugar, evaporated milk and cocoa. Stir over high heat until the mixture comes to a rolling boil. Lower heat to medium and continue stirring until it reaches softball stage (240 degrees F with a candy thermometer. Mine had a nifty little arrow that pointed to where the mercury should be for the soft ball stage!). Remove from the heat and add peanut butter and margarine. Stir by hand until well combined and creamy. Pour into a greased pan (I used a 9x13. For a thicker fudge, use a 9x9 or 8x8) and let harden.
To see other delicious recipes, check out Foodie Friday over at Designs by Gollum!
Thursday, December 17, 2009
No Bake Cookies
Mmmmmm!

 ...1/2 cup milk
...1/2 cup butter
...2 cups sugar
...6 T. cocoa powder
...3 cups oatmeal (uncooked)
...1 heaping spoonful of peanut butter (not pictured)
In a medium saucepan over medium heat, bring milk, butter, cocoa, sugar and peanut butter to a boil. Continue to let boil for 1 minute. After 1 minute of boiling, remove from heat and stir in oatmeal. Drop by spoonfuls onto waxed paper and let cool until hardened.
To see more great holiday recipes, check out the Ultimate Recipe Swap going on over at Life as Mom!
Wednesday, December 16, 2009
Grandma's Peanut Butter Balls

 ...2 cups creamy peanut butter
...3/4 cup butter
...3 1/2 cups powdered sugar
...3 cups Rice Krispies Cereal
...1 pound chocolate (I used Hershey's Kisses because it's what I had on hand. Chocolate chips, baking squares, etc. will also work!)
...2 T. shortening
In a large mixing bowl combine peanut butter and melted butter until smooth. Stir in powdered sugar and Rice Krispies until a dough is formed. Cover the bowl and place in the refrigerator for an hour to chill. Once dough is chilled, form dough into small balls and freeze for 20 minutes. Meanwhile, in a medium bowl, melt chocolate and then stir in shortening until smooth. Dip frozen peanut butter balls into chocolate and place on waxed paper to harden.
Tuesday, December 8, 2009
Chocolate Chip Cookies

 ...3 1/2 cups flour
...1 t. baking powder
...1 t. baking soda
...1 t. salt
...1 cup butter, softened (you can also substitute unsweetened applesauce or plain yogurt to lessen fat and calorie content. I would have but I didn't have any of either on hand and was NOT going to the store for like the 5th time that day...)
...2 cups brown sugar
...6 T. white sugar
...2 eggs
...4 t. vanilla extract
...1 bag of chocolate chips
In a large bowl combine flour, baking powder, baking soda and salt with a fork until well combined. Set aside, and in another large bowl cream together butter and sugars until smooth. Add eggs and vanilla and stir until well combined. Stir wet mixture into flour mixture until well combined. The dough will be a little tougher than normal cookie dough, just work with it and be patient until everything is well combined. Fold in chocolate chips until well distributed. Roll dough into balls and place on cookie sheet (if you prefer a flatter cookie, flatten the balls as you place them on the baking sheet) and bake at 350 for 10 minutes.
To see more tasty recipes, check out Tasty Tuesday over at Balancing Beauty and Bedlam and at Tempt my Tummy Tuesday over at Blessed with Grace.
Saturday, November 14, 2009
S'mores Brownies
 ...graham crackers
...marshmallows (about a half bag of mini marshmallows)
...chocolate (you can use chips, chocolate bars, whatever you have on hand. I used about 4 fun sized Hershey's Bars with Almonds)
...Brownie Mix (I used a box because I wanted to get it used up, you can use homemade or whatever you please!)
Grease a 9x13 pan and line the bottom with graham crackers. You will have to do some cracker breaking and cutting to get it all to fit well. Prepare brownies according to box/recipe instructions. Spread brownie batter over graham crackers (this proves to be a trick as the crackers move around quite a bit. Don't say I didn't warn you!). Bake at 350 for 25-30 minutes. Remove from oven and layer marshmallows on top of brownies, and then sprinkle with crushed chocolate bars or chocolate chips. Place back in oven for an additional 3-5 minutes. Let cool before cutting/serving.
To see more great recipes, check out Mouthwatering Monday over at A Southern Fairytale!
Saturday, September 19, 2009
Caramel Brownies


...1 package of brownie mix (you can also make your own. I'm just trying to get all the random boxes of convenience food out of my pantry. You also need the ingredients in the recipe (or listed on the box), that is why I have eggs and yogurt (which I used in place of the oil called for) pictured)
...Individually wrapped caramels
...Caramel ice cream topping
Mix brownie batter according to package (or recipe) directions. Stir in as many or as few unwrapped caramels as you wish. Pour into a 8x8 baking dish and bake according to directions on package (or in recipe). When the brownies are finished baking, allow to cool and then top with caramel ice cream topping before serving.
Friday, August 28, 2009
Chocolate Cupcakes
 ...2 cups sugar
...2 eggs
...3/4 cup butter (or applesauce or yogurt. I just used butter cause it was all I had on hand)
...1/2 cup boiling water
...2 1/2 cups flour
...3/4 cup cocoa
...2 teaspoons baking soda
...Pinch of baking powder
...1 teaspoon of vanilla
...1 cup boiling water
Mix sugar, eggs, butter and 1/2 cup boiling water together. Add remaining ingredients and mix well. Pour into cupcake pan and bake at 350 for 15-20 minutes.
 I'm not gonna lie. I was worried about this. Usually homemade chocolate cake turns out pretty disasterous for me, but these were absolutely DELISH! (despite that the 2 year olds in my class would only eat the frosting. But I took that with a grain of salt. They're two.) Perfectly moist and chocolatey to boot! I'm definetely making this my new chocolate cake recipe...for cakes and cupcakes alike! YUM!
 To see other tasty dishes, check out the Recipe Swap going on over at The Grocery Cart Challenge!
Friday, July 17, 2009
Scotcheroos
I have always been a pretty big fan of scotcheroos...they're just so yummy!
Ingredients...
...1 cup white sugar...1 cup corn syrup
...1 cup peanut butter
...6 cups Rice Krispie cereal
...1 bag chocolate chips
In a saucepan over medium heat, combine sugar and corn syrup. Bring to a rapid boil. Remove from heat and stir in peanut butter until smooth. Add to Rice Krispies in a large bowl and stirl until cereal is evenly coated. Spread into a greased 9x13 pan. In the microwave, melt chocolate chips until smooth. Spread over cereal mixture. Chill until chocolate is hardened.
Friday, June 26, 2009
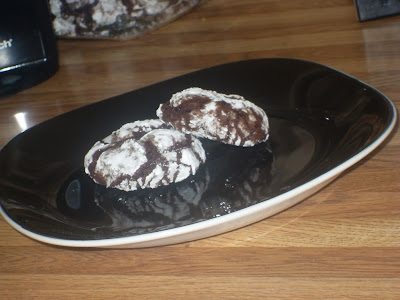
Chocolate Crinkles

...2 c. sugar
...1/2 c. oil
...4 eggs
...2 t. vanilla extract
...2 c. flour
...2 t. baking powder
...1/2 c. powdered sugar
Directions...
In a medium bowl, mix together cocoa, white sugar and oil. Beat in eggs one at a time and then stir in vanilla. Combine flour and baking powder and then stir into cocoa mixture. Cover dough and chill for at least 4 hours.
Preheat oven to 350* and grease cookie sheet. Roll dough into 1" balls and coat in powdered sugar. Bake in preheated oven for 10-12 minutes. Let cool for one minute on cookie sheet, then transfer to cooling rack.
My Thoughts...
 These are good! So good that I can't keep my hands off of them...which is baaad!
To see more great recipes check out the Recipe Swap over at Grocery Cart Challenge!
Thursday, June 25, 2009
O'Henry Bars
 ...2 c. quick cooking oats
...1/2 c. white corn syrup
...3/4 c. margarine
...1 c. brown sugar
...1 (6 oz.) pkg. chocolate chips
...3/4 c. peanut butter
Directions...
Mix the first four ingredients and spread into greased 9x13 pan. Bake at 350* for 12-15 minutes. Melt chocolate chips and peanut butter, spread over cooled "crust" mixture and cool. Cut into bars and serve!
 Okay, first off, this isn't my picture. I borrowed it from Three Lab Bakery. But it is my recipe...I just forgot to take a picture of the finished product before they got all gobbled up! This is such a delicious recipe...and childhood memories of eating these at my grandma's house came flooding back with each bite. This is a simple, but delicious bar that you must try. Stat. So get to your kitchen and get mixing!


