Thursday, December 31, 2009

Tortilla Pinwheels

If you are looking for a quick, easy and low maitenance appetizer for an upcoming event (*cough*cough* perhaps a new years countdown?) then this is your recipe. Not only is is quick and easy, but once it's made...you can pretty much put it on a serving plate on the table and forget about it. No worries about how to keep it warm, keep it from melting...just fix it and forget it. Well, don't entirely forget it. I do hope that you'll remember to at least eat it! But that shouldn't be a problem, because not only are these quick and easy little appetzers...they're delicious too!

These would work for any occaison as well...not just a new years party! You could make them for family gatherings, a picnic, a potluck, just for fun...the possibilites are endless because you will never find an occaison to which these will not be a perfectly acceptable addition to the culinary spread!


Ingredients...


...10-12 tortillas
...6 green onions, finely chopped
...1/4 c. salsa
...8 oz. cream cheese, room temperature
...4 oz. shredded cheese

Directions...

In a large bowl, stir together green onions, cream cheese, salsa and shredded cheese. Spread over a tortilla, which has been microwaved for 30 seconds (this option is not entirely necessary, but makes the rolling process that much easier). Store in a covered container in the refrigerator for several hours and then slice into rounds.

Wednesday, December 30, 2009

Mini Sliders

This is the most perfect starter for a night out for two reasons. First, they are small enough not to count as a full meal. Second, they are big enough to put enough food in your stomach so that you aren't snacking on the super calorific appetizers all night! Not only would these make a great starter for any party or night out, but they also make a fun and easy meal. The only downside to this recipe? I don't measure. I just guess. So figuring measurements out is up to you and what looks good!


Ingredients...


...1 lb. ground meat
...2 eggs
...Shredded Cheese
...Seasoned Salt
...Minced Onion
...Garlic Powder

Directions...

In a large bowl, combine ground meat, eggs and cheese. Add in seasoned salt, garlic powder and minced onion until the flavor is to your liking. Form small patties from the mixture and cook in a hot skillet until browned all the way through. Serve on rolls or small hamburger buns with the appropriate condiments!

Tuesday, December 29, 2009

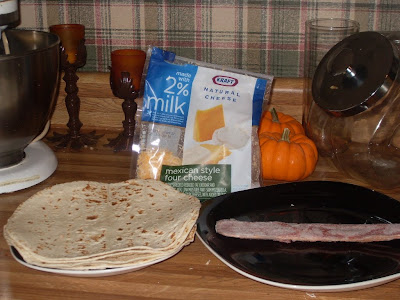
Bacon Quesadillas

New Years Eve is in just a few short days...are you ready? Whatever your plans are...going out, staying in, hosting a party, attending a party...here is your solution. This tasty and different quesadilla would be a great tummy filler before heading out on the town for the night...or a great appetizer to contribute to any party you may be hosting/attending for the big countdown. And if you're planning on sitting at home and watching the ball drop, then this would be a great addition to your snacking fare for the evening!


Ingredients...


...Tortillas (two per quesadilla)
...Bacon (one slice per quesadilla)
...Cheese (the amount can be determined by you)

Directions...

Cook bacon, according to your own preferences (I cook mine in the microwave). In a skillet, warm a small amount of olive oil. Place one tortilla in the pan and cover with cheese, leaving room around the edges. Cut bacon into pieces and top cheese with it. Put second tortilla on top and cook until cheese is melted. Flip, to brown top tortilla just a little bit. Cut into fourths and serve.

Saturday, December 26, 2009

Beef Gravy over Noodles

Hubs always begs me to make sausage and gravy over biscuits. Except for one thing. I don't like sausage. I know, I know. It can't be natural to not like sausage. But I don't. So when I found this recipe for beef gravy I figured that maybe I was onto something! Hubs gets his gravy to eat over whatever he pleased...and I don't have to eat sausage. If you are a huge sausage gravy fan, then I'm warning you now that this isn't the dish for you. You will be disappointed by the lack of spice in this recipe compared to sausage gravy. I however, thought that this was absolutely fab! The spice was just right for me, it is great served over just about anything, and it's super simple to make, which is great for a busy night!


Ingredients...


...1 lb. ground meat
...1/3 c. flour
...3 1/4 c. milk
...black pepper
....salt
...garlic powder (not pictured)
...minced onion (not pictured)

Directions...

In a skillet, brown the ground meat. Once the meat is done, add the flour and continue cooking until the flour is no longer white. Add the milk and cook over medium high heat until thickened. While the milk is thickening, add salt, pepper, garlic powder and minced onion until it is the desired taste. Serve over noodles, mashed potatoes, biscuits, rice, or anything else that you please!

Friday, December 25, 2009

Pecan Pie

MERRY CHRISTMAS!!

I hope that you are all enjoying the day, and remembering the true meaning! And just so you know, no, I am not blogging on Christmas. I sneakily scheduled this one to post on it's own so I can spend the day competely and entirely with my family! But I figured I best share a last minute pie recipe with you, just as I did on Thanksgiving with the Pumpkin Pie...because I know that there are a few of you out there hurridly searching for a last minute recipe for...something...to take to that family gathering today...or maybe to put your kids in a sugar induced coma with so you can sneak in a nap (sneaky little you!). So here. Make this. Because you can never eat too much pie at this time of year...and with New Years in a week (and that inevitable resolution to lose weight come the new year) you better get all the pie in while you still can! This is pretty different recipe from your typical pecan pie. It doesn't call for Karo syrup. And it's still delicous. Perhaps even more so. Give it a try. I bet you'll like it!


Ingredients...


...1 unbaked pie crust (9")
...1 cup light brown sugar
...1/4 cup white sugar
...1/2 cup butter
...2 eggs
...1 T. all purpose flour
...1 T. milk
...1 tsp. vanilla extract
...1 cup chopped pecans

Directions...

In a large bowl, beat eggs until foamy and then stir in melted butter. Stir in the brown sugar, white sugar and flour until smooth. Add the milk and vanilla and then stir in the nuts. Pour into the unbaked pie shell and bake at 400 for 10 minutes. Reduce the heat to 350 and bake an additional 30-40 minutes.

Thursday, December 24, 2009

Monkey Bread

Merry Christmas Eve! I'm sure today finds you hurridly finishing last minute details for tomorrow! I thought it most appropriate that today I share a recipe for a breakfast delight that you can make tomorrow morning for after church or while you open gifts with your littles. Growing up, we always had a tradition of having cinnamon rolls on Thanksgiving, Christmas and Easter mornings. I've decided to keep with this tradition now that I am starting my own family, and this year I am making this delicious monkey bread for our Christmas morning breakfast! It's so gooey and delicious warm from the oven...mmmmm...I'm salivating just thinking about it!


Ingredients...


...1 cup white sugar
...2 tsp. cinnamon
...1 pound bread dough (or 3 cans of refrigerator biscuits)
...1/2 cup. butter
...1 cup brown sugar, packed

Directions...

In a small bowl, stir together white sugar and cinnamon until well combined. Divide bread dough into small balls (if you are using refrigerator biscuits, divide each biscuit into four pieces) and roll in the cinnamon sugar mixture. Place coated balls into a well greased bundt pan. In a small saucepan, melt butter and then stir in the brown sugar. Bring to a boil and continue to let boil for 1 minute. Pour the mixture over the dough in the pan and then bake at 350 for 20-30 minutes. Once removed from the oven, let cool for 10 minutes before turning the pan over on a plate and dumping the bread out.

Wednesday, December 23, 2009

Layered Chocolate Pie Dessert

If you are plum fresh out of ideas for something to take to a soon coming Christmas gathering, then I urge you to take this. This, Heaven in a Pan, AKA Layered Chocolate Pie Dessert. AKA Robert Redford Dessert. AKA DELICIOUS NO MATTER WHAT YOU CALL IT!! It's creamy, it's rich (but not too rich!) and it's a refreshing change from pies and cookies (not that I'm complaining about pies and cookies!). I doubt you'll have leftovers when you do make this for your family gathering, and if...IF you have leftovers, it's a perfectly acceptable next day breakfast.

At least that's what I told myself...

Because over the holidays calories don't count :)

And because I'm 5 months pregnant, so that kind of thing is acceptable ;)


Ingredients...


Crust:
...2 c. flour
...1 1/2 sticks butter
...1/2 c. nuts (I used chopped pecans, and they're not pictured)

Mix all three ingredients together and lightly press into the bottom of a greased 9x13 pan. Bake at 350 for 20 minutes. Allow to cool completely.

Filling:
...8 oz. cream cheese (at room temperature)
...1 c. powdered sugar
...1/2 tub Cool Whip

Mix these three ingredients together and spread over top of the cooled crust.

Pudding:
...2 (3 oz) boxes of chocolate pudding mix
...3 c. milk

Mix pudding and milk together according to package directions. Spread over the cream cheese layer.

Topping:
...1 tub Cool Whip
...Crushed Reeses Peanut Butter Cups (or nuts, shaved chocolate...anything goes really)

Spread Cool Whip over pudding layer and then sprinkle crushed (insert what you're using here) over the Cool Whip. Refrigerate until serving time.

Tuesday, December 22, 2009

Chocolate Peanut Clusters

This is another of the candies that my Grandma always made in her Christmas candy spread each year. This isn't her exact recipe, it's actually one that I just made up on the fly this year, but I'm very happy with how they came out! This is a very simple candy that even the most novice of candy makers can make to share with family and friends during the holiday season! Just be sure to make extra, because they will disappear fast!


Ingredients...


...1 pound of chocolate (again, I used Hershey's Kisses because it's what I had on hand. You can use chocolate chips or baking chocolate as well!)
...2 T. shortening
...peanuts

Directions...

Melt chocolate in the microwave and then stir in shortening until smooth. Add in peanuts until the mixture is the consisstency you like. You can really make these however you want, more chocolate, more peanuts or an equal amount of each. Just keep adding peanuts until it is how you want it. Drop by spoonfuls onto waxed paper to harden.

To see more delicious recipes check out Tasty Tuesday over at Balancing Beauty and Bedlam and Tempt my Tummy Tuesday over at Blessed with Grace.

Saturday, December 19, 2009

Pecan Tassies

This is yet another of my childhood favorites when it comes to Christmas candy! We used to make these every year growing up, but then in my teen years we stopped for some reason. And then I kind of forgot that they even existed until I stumbled upon a recipe a few months ago. I instantly bookmarked it, knowing that I was planning to recreate several of my grandma's candies this year. These little tassies are like a bite size pecan pie. So sweet and so yummy!


Ingredients...


...6 oz. cream cheese
...2 c. flour
...1 c. butter
...1 egg
...3/4 c. packed brown sugar
...1 T. butter, softened
...1 tsp. vanilla
...1/4 tsp. salt
...3/4 c. chopped pecans

Directions...

In a medium bowl, soften 1 c. butter and cream cheese. Stir in flour and mix with fork until ingredients are well combined (dough will be crumbly). Refrigerate for 1 hour, or overnight. Make balls from dough and flatten in the palm of your hands. Press into mini muffin tins. In a seperate medium bowl, cream together egg, 1 T. butter and brown sugar. Stir in vanilla, salt and pecans. Spoon mixture into crust in muffin tins, to about 3/4 full (to prevent bubbling over). Bake at 325 for 25 minutes. Let cool in tins before removing.

Friday, December 18, 2009

Chocolate Peanut Butter Fudge

Would it even be Christmas time without a plate of fudge to snack on? Fudge is just one of those candies that epitomize Christmas food! There are so many varieties out there...versions with nuts, versions that can be made entirely in the microwave, versions with marshmallows, white chocolate versions...and versions like this that call for the beautiful marriage of chocolate and peanut butter. This was incredibly simple to make, I know that candy making can be intimidating...especially to beginning candy makers, but this was really easy. Not a bit intimidating.

Okay, I lied.

It was a little intimidating.

But that was only before I learned what soft ball meant. Once I learned that candy making phrase and it's meaning it wasn't so much intimidating anymore.


Ingredients...


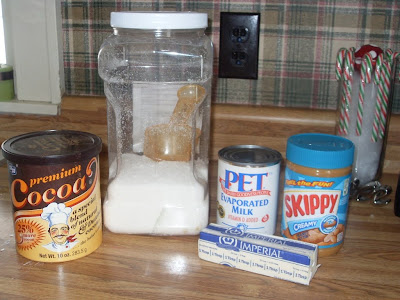
...3 cups white sugar
...1 cup evaporated milk
...1/4 cup cocoa
...1/2 cup peanut butter
...1 T. butter

Directions...

In a saucepan stir together the sugar, evaporated milk and cocoa. Stir over high heat until the mixture comes to a rolling boil. Lower heat to medium and continue stirring until it reaches softball stage (240 degrees F with a candy thermometer. Mine had a nifty little arrow that pointed to where the mercury should be for the soft ball stage!). Remove from the heat and add peanut butter and margarine. Stir by hand until well combined and creamy. Pour into a greased pan (I used a 9x13. For a thicker fudge, use a 9x9 or 8x8) and let harden.

To see other delicious recipes, check out Foodie Friday over at Designs by Gollum!

Thursday, December 17, 2009

No Bake Cookies

This is the first recipe that I ever made on my own. It was actually my first 4-H project too :) Since then, I have not tired of this recipe. It's another one of those recipes that we made a lot growing up and so it just reminds me of my childhood everytime I make it! This would be a great recipe for your kids to help you out with...they will love helping to drop these onto the wax paper and mix in the ingredients. Just be sure to watch their little fingers or you may not have many left on the waxed paper at the end of the day! These would make a great addition to any candy and cookie platter...because while they are techinically called a cookie...couldn't they be considered a candy? I sure think so....

Mmmmmm!


Ingredients...


...1/2 cup milk
...1/2 cup butter
...2 cups sugar
...6 T. cocoa powder
...3 cups oatmeal (uncooked)
...1 heaping spoonful of peanut butter (not pictured)

Directions...

In a medium saucepan over medium heat, bring milk, butter, cocoa, sugar and peanut butter to a boil. Continue to let boil for 1 minute. After 1 minute of boiling, remove from heat and stir in oatmeal. Drop by spoonfuls onto waxed paper and let cool until hardened.
To see more great holiday recipes, check out the Ultimate Recipe Swap going on over at Life as Mom!

Wednesday, December 16, 2009

Grandma's Peanut Butter Balls

Every Christmas, my grandma would spend WEEKS in the kitchen preparing for all of her children and grandchildren to come spend Christmas day eating, rejoicing and visiting in her home. Several days worth of her preperations would be candy making. My favorite candy every year would be this peanut butter ball recipe. I just couldn't get enough of these tasty little confections! Once Grandma passed, we never got any homemade candy at Christmas anymore. I finally decided that it's time for someone to carry on the tradition, and I am taking that upon myself. I couldn't stop sneaking taste tests of these amazing peanut butter delights while I was making them, they just brought back so many memories of Christmas' from my childhood!


Ingredients...
...2 cups creamy peanut butter
...3/4 cup butter
...3 1/2 cups powdered sugar
...3 cups Rice Krispies Cereal
...1 pound chocolate (I used Hershey's Kisses because it's what I had on hand. Chocolate chips, baking squares, etc. will also work!)
...2 T. shortening

Directions...

In a large mixing bowl combine peanut butter and melted butter until smooth. Stir in powdered sugar and Rice Krispies until a dough is formed. Cover the bowl and place in the refrigerator for an hour to chill. Once dough is chilled, form dough into small balls and freeze for 20 minutes. Meanwhile, in a medium bowl, melt chocolate and then stir in shortening until smooth. Dip frozen peanut butter balls into chocolate and place on waxed paper to harden.

Tuesday, December 15, 2009

Gingerbead Cookies

Happy Cookie Tuesday! This is one of those It-Wouldn't-be-Christmas-without-Them cookies. I've never really been a fan of gingerbread. It's just too spicy for me. But a lot of people like them and I will admit that the gingerbread man shape just makes me all warm and fuzzy inside! So here is a gingerbread recipe for you to make your little Christmas men with. These cookies are so moist and chewy (yes. I tried them. Despite my lifelong distaste.) and they have a nice amount of spice to them. I'm pretty sure you'll enjoy them :)


Ingredients...
...1 pkg. cook and serve butterscotch pudding
...1/2 cup applesauce (or butter, plain yogurt, or oil)
...1/2 cup packed brown sugar
...1 egg
...1 1/2 cups flour
...1/2 tsp. baking soda
...1 1/2 tsp. ground ginger
...1/2 tsp. cinnamon

Directions...


In a medium bowl, stir together the dry pudding mix, applesauce and brown sugar until smooth. Add in flour, baking soda, ginger and cinnamon. Stir well until smooth and there are no lumps. Cover and chill in the refrigerator for a minimum of 1 hour. If you are planning to make gingerbread men, roll the dough until it is 1/8 of an inch thick on a well floured surface and use cutter to make your shapes. If not, then place 1 inch dough balls on a cookie sheet. Bake at 350 for 10-12 minutes.

Saturday, December 12, 2009

Baked Pancake Squares

Is your family nuts about breakfast food like mine is? I'm always in search of new breakfast food recipes to try so that we don't get sick and tired of the same old same old. When I found this one, I was practically giddy! I love making pancakes, except for the whole cooking them part. I always seem to burn them. Baking them in the oven just seemed like the perfect solution.

And oh, trust me, it sooo is!


Ingredients...


...3/4 cup milk (not pictured)
...2 T. applesauce (you can sub butter or plain yogurt here as well)
...1 egg
...1 T. white sugar
...1 cup flour
...2 tsp. baking powder
...1/4 tsp. salt

Directions...

In a large bowl stir together egg, milk, applesauce and sugar until well combined. Stir in flour 1/2 cup at a time. Add in baking powder and salt and stir until everything is well combined. Pour batter into a greased 8x8 pan and bake at 350 for 20-30 minutes.

To see more tasty recipes, check out Mouthwatering Monday over at a Southern Fairytale!

Friday, December 11, 2009

White Lasagna

I know, I know. This picture looks totally unappetizing. But trust me, this is a really great recipe! It's super simple and super delicious. That just can't be beat, right? I got this recipe from one of my coworkers. I had been thinking about how to make something like this on my own, and then she burst in the door at work one morning excited to tell me about this a-maz-ing recipe her sister had made the night before that I just had to try. I'm glad she told me how her sister did it before I started experimenting, because I was going with a whole lot more complicated recipe in my head. You have two options for the sauce...you can go the super easy route like I did and use a jar of Ragu alfredo sauce. Or you can make your own alfredo sauce. It's totally up to you. Really.


Ingredients...
no picture, sorry! But no worries, there are only 4 ingredients, so it won't be too hard to imagine!
...6 lasagna noodles
...2 cooked chicken breasts, shredded or cubed
...1 jar of Ragu alfredo sauce (or your own homemade alfredo sauce.)
...1 bag shredded mozzerella cheese
Directions...
Depending on your noodles, you may need to boil them. If you have the oven ready noodles though, you're set. Layer 3 noodles on the bottom of a greased 9x13 pan. Pour half of the sauce over the noodles and 1 of the shredded or cubed chicken breasts. Place remaining 3 noodles on top of chicken and cover with remaining sauce and chicken. Cover entire dish with bag of cheese and bake in preheated oven at 350 for 20-30 minutes - until bubbly and warmed through.

Thursday, December 10, 2009

Orange Raisin Muffins

I was searching for a new and different muffin recipe the other day when I came upon this. Orange flavored muffins...sounds, well, interesting. I almost passed it over and kept looking, but my interest was caught. I knew I must try this muffin recipe. When I bit into this muffin, it was like I was eating a fresh orange...except in bread form. Seriously! I'm amazed at how true the fresh orange flavor stayed in this muffin! Usually in baking, flavors get lost, but the orange taste shows right through in this recipe! Luuuurrrrvvveee it! When I was mixing up the ingredients, I was in love with how much like an Orange Julius it smelled. Which got me to thinking that I need to research a muffin option to taste just like a Julius. And if there are no recipes out there, then I will make one.

Mark.

My.

Word.


Ingredients...
...1 large orange
...1/2 cup orange juice
...1/2 cup applesauce (you can also substitute butter or plain yogurt if you have no applesauce)
...1 egg
...1 1/2 cups flour
...3/4 cup sugar
...1 tsp. baking powder
...1 tsp. baking soda
...1 tsp. salt
...1/2 cup raisins

Directions...

Peel orange and place peel in blender or food processor. Split orange into sections and also place in blender or processor. Add orange juice as well, and then blend or process until smooth. Add egg and applesauce, continuing to blend until all ingredients are smooth and there are no lumps. In a large bowl, combine flour, sugar, baking powder, baking soda and salt until well combined. Stir in orange mixture until all ingredients are wet. Fold in raisins. Portion into muffin tins and bake at 400 for 15 minutes.

To see more recipes featuring oranges, check out the In Season Recipe Swap over at Tammy's Recipes!

Wednesday, December 9, 2009

Southwest Roll Ups

We love us some good Mexican fare in this house! If hubs offers up a date night to Carlos 'o Kelly's, I'm there in an instant! So when I get a chance to try out a new recipe at home like this one, I get pretty excited to say the least! Not only is this delicious, but it's super simple, and also freezes great, so on those nights when you're strapped for time and don't have all night to prep and cook, you can just whip these out of the freezer, toss in the oven and serve.

Great food that's EASY too?!? My work here is done...


Ingredients...


...1 can refried beans
...1/2 cup salsa
...1-2 cups diced, cooked chicken
...tortilla shells
...shredded cheese

Directions...

In a medium bowl mix together refried beans, chicken and salsa. Place a large spoonful of the mixture in the middle of a tortilla shell and sprinkle with cheese. Roll up and place in a lightly greased oven safe baking dish. Bake at 350 for 25-30 minutes.

Tuesday, December 8, 2009

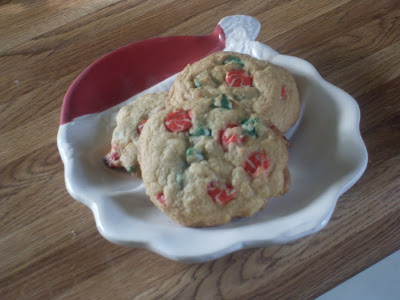
Chocolate Chip Cookies

Happy Cookie Tuesday! These chocolate chip cookies are sure to please Santa when he comes shooting down your chimney in a few weeks! Don't be skeptical of the ingredient amounts in this recipe and scale them down. DON'T! I was really skeptical too, but I still made the recipe as written and they turned out beautifully! Chewy, delicious...everything a chocolate chip cookie should be! I chose to use the holiday swirl chips in this recipe as well, and that was a fun twist! They taste like white chocolate, which was a very tasty variation for this time of year! I hope your families and Santa enjoy these as much as I do!


Ingredients...


...3 1/2 cups flour
...1 t. baking powder
...1 t. baking soda
...1 t. salt
...1 cup butter, softened (you can also substitute unsweetened applesauce or plain yogurt to lessen fat and calorie content. I would have but I didn't have any of either on hand and was NOT going to the store for like the 5th time that day...)
...2 cups brown sugar
...6 T. white sugar
...2 eggs
...4 t. vanilla extract
...1 bag of chocolate chips

Directions...

In a large bowl combine flour, baking powder, baking soda and salt with a fork until well combined. Set aside, and in another large bowl cream together butter and sugars until smooth. Add eggs and vanilla and stir until well combined. Stir wet mixture into flour mixture until well combined. The dough will be a little tougher than normal cookie dough, just work with it and be patient until everything is well combined. Fold in chocolate chips until well distributed. Roll dough into balls and place on cookie sheet (if you prefer a flatter cookie, flatten the balls as you place them on the baking sheet) and bake at 350 for 10 minutes.

To see more tasty recipes, check out Tasty Tuesday over at Balancing Beauty and Bedlam and at Tempt my Tummy Tuesday over at Blessed with Grace.

Saturday, December 5, 2009

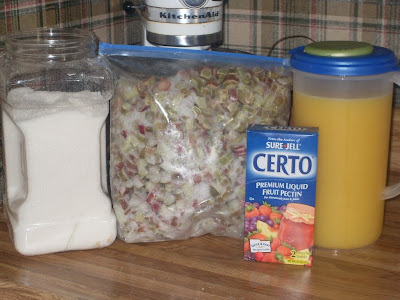
Rhubarb Jam

So this is more of a summer recipe...making jam is just something you do in the summer. However, I made two batches on a chilly fall (winter?) day. I was taking inventory of my deep freeze when I noticed that we only have one container of the Strawberry Rhubarb Jam left from when I made it in June. So I pulled out some of the frozen rhubarb I had chopped up when it was fresh from the crop and made up this version. It's a bit more tart than the strawberry rhubarb version...but it's still ohhh so good! I love homemade jam!


Ingredients...


...6 1/2 cups rhubarb, chopped
...1/3 cup orange juice
...1/2 cup water
...2 cups sugar
...Fruit Pectin (optional)

Directions...

Place rhubarb, orange juice, water and sugar in a large saucepan or stockpot. Bring to a rolling boil and let it boil for 15 to 20 minutes, or until thickened. At this point, you can add a half packet of fruit pectin if you wish, but the orange juice has enough natural pectin in it to appropriately thicken the jam on it's own. Adding pectin is up to each individual person and how thick they like their jam. Place into freezer containers and freeze until ready for use. Store in refrigerator in between uses.

Friday, December 4, 2009

Crockpot Meatballs in BBQ and Cranberry Sauce

It's at this time of year that I truly appreciate my crockpot. It comes in handy on so many occaisons! In all the hustle and bustle and running around that comes with the holiday season, it's so nice to have supper slow cooking at home so you don't have to worry about rushing through supper preparation when you get home! The slow cooker is also a great way to transport your delicious dishes to family get togethers! It's also a great way to free up some oven space for the other dishes you and family are preparing for family gatherings.

This recipe is sooo simple and amazingly delicious! At first I thought that the combination of ingredients was really weird, but then I figured that most meatball recipes call for a strange combination of ingredients, so might as well give this a shot! Besides, who doesn't have a can of jellied cranberries sitting in their pantry during this time of year?!?


Ingredients...
...1 lb. meatballs (I used homemade meatballs that I premade a week before and then froze until ready to toss in the crock...)
...1 can jellied cranberries
...1/2 cup barbecue sauce
...1 T. soy sauce

Directions...

Slice jellied cranberries into thin slices and line bottom of crockpot with the slices. Cover craberry slices with barbecue and soy sauces. Place (still frozen) meatballs on top of saues and cranberries. Cook on low for 4-6 hours or on high for 2-3.

As a side note, you can use meatballs that aren't frozen for this recipe, just watch the cooking time, and shorten it some since the meatballs are already thawed out.

To see more great recipes, check out Mouthwatering Monday over at A Southern Fairytale!

Thursday, December 3, 2009

Garlic Pull Apart Bread

We have pizza night once a week around here, and I like to have some sort of a garlic bread to go with it. I usually just whip up a batch of french bread and then toast it with some garlic powder and butter. I decided to go with something a little different this time around and made this garlic-y pull apart bread. This recipe is the exact same concept as monkey bread, except with garlic. I really like the concept of this bread and it was a great alternative to the normal garlic bread that I make. This picture does it no justice...it was much tastier than it looks, and it was even better dipped in marinara!


Ingredients...


...2 tubes of refrigerator biscuits
...1/4 cup butter
...1/2 T. garlic and herb blend spice (you can also substitute 1 T. parsley flakes, 1 tsp. garlic powder and 1/4 tsp. garlic salt if you don't have the herb blend on hand)

Directions...

Cut each biscuit into quarters and roll into a ball. In a small bowl, melt butter and then stir in seasoning(s). Cover each dough ball in butter/seasoning mixture and place in a greased loaf pan. Bake at 350 for 25-35 minutes.

To see more great recipes, check out the Recipe Swap going on over atr Life as Mom!

Wednesday, December 2, 2009

Chicken Tetrazinni

I have never tried chicken tetrazinni before. I have actually only even heard of it a handful of times before. I am super glad that I tried it though, this was fabulous! Plus, it's semi-healthy with only cheese and cream of mushroom soup being the questionably fattening ingredients. This is such a great wintery comfort food too. It's creamy and warm. Plus it's easy and it would freeze well and be a great make ahead meal to throw in the freezer for those crazy busy nights when cooking is the last thing on your mind.


Ingredients...
...2 c. spaghetti, cooked
...1 chicken breast or hindquarter, cooked and chopped into pieces
...1 can cream of mushroom soup (chicken will work as well)
...1 c. chicken broth
...1/4 onion, chopped
...1/2 c. pepper (you can use any color. I used green and yellow)
...1 1/2 c. shredded cheese

Directions...

Place all ingredients in an oven safe casserole dish and stir well to combine all ingredients. Bake at 350 for 25-30 minutes.

To see more great main dish recipes, head on over to Cooking During Stolen Moments for the main dish of the Bloggy Progressive Dinner!

Tuesday, December 1, 2009

Cake Mix Cookies

Happy December! The Christmas season is officially upon us and I am having a blast with all of these Christmas recipes in the kitchen! Homemade cookies, candies, bars...all of it just screams Christmas to me! So, on every Tuesday from now until Christmas, I am going to share a different cookie recipe, so that way you and your family have a selection to choose from for Santa! Because we all know that you can't go to bed peacefully on Christmas Eve night without having that plate of cookies and glass of milk sitting out for Santa!

This week's cookie recipe seriously couldn't get any easier! Three ingredients and about a half hour of your time from start to finish and these cookies are done. And they're good too! So if you are a procrastinator, this is your last minute cookie for any occaison...Santa, a get together...or just a midnight craving :)


Ingredients...


...1 boxed cake mix
...1/2 cup oil (I substituted light sour cream. Applesauce or plain (or vanilla) yogurt would work as well)
...2 eggs

Directions...


Place all ingredients into a large bowl and mix well. Form dough into balls and bake at 350 for about 7 minutes. Let cool a few minutes before removing from cookie sheet.

I should note that my dough was still pretty runny and there was no way it was forming into balls. So I just dropped it on the cookie sheet by spoonfuls. They turned out just fine, but with a bit different consistency than other cake mix cookies I've tried in the past.

Head on over to The Finer Things in Life to check out the Dessert Edition of Finer Things Friday...yuuuummmmm!!

Saturday, November 28, 2009

Thanksgiving Leftovers Casserole

I wasn't really sure what to call this one. It is 100% made up by me. I had no clue what I was doing while I was concocting it, I was just throwing random leftovers together. And then I got nervous, because what if it tasted awful and I just wasted all that food? That didn't even end up being a problem...this turned out really good! Kinda sweet, but not too much and lots of good flavor. So I'm really happy with how this turned out.

I may be the only one.

I'm okay with that.

Although hubs did have seconds. And thirds. Just sayin'...


Ingredients...


Totally ignore the crescent rolls and pretend they're not there. Add in leftover mashed potatoes in their place. I don't know what I was thinking when I was staging this photo...

...Stuffing Mix (yes. I used boxed. I ran out of the homemade stuff, and didn't have the time or ingredients to make more...)
...Turkey, shredded or chunked
...Mashed Potaotes
...Cranberries

Directions...

In a large bowl combine together the stuffing, cranberries and turkey. Place into an oven safe casserole dish, and then spread mashed potatoes over top of the stuffing mixture. Bake at 350 for 30 minutes, or until heated through.

To see more delicious recipes, check out Mouthwatering Monday over at A Southern Fairy Tale!

Friday, November 27, 2009

Turkey and Dressing for Sandwiches

I hope you all had a fabulous Thanksgiving! I'm sure that you were stuffed to the gills by the end of the day, and then had enough leftovers to make you sick at the thought of MORE turkey. Instead of choking down more, transform your leftovers into delicious sandwiches! This is a very simple recipe that calls for only things that were on your Thanksgiving table yesterday. This also freezes well...so if more Thanksgiving food really does make you sick, just whip up a batch of this and toss it in the freezer until your're ready for more! This is also a super simple recipe to whip up if you were out shopping this morning before the sun rose then you can make up a quick batch of this for your family before your collapse into bed in post shopping exhaustion :)


Ingredients...


...Gravy (I used 1 packet of McCormick gravy. You can use leftovers)
...Turkey
...Dressing

Directions...

The directions on this one are kind of hazy. Basically, all I did was toss in stuffing, some turkey, and 1 cup of gravy. I just kept adding each ingredient until the ratios seemed right and the mixture seemed the right consistency. I would say that the ratio of dressing:gravy:turkey was 3:2:1. Really, just experiment and keep adding until it is the consistency that you wish.

Thursday, November 26, 2009

Pumpkin Pie

HAPPY THANKSGIVING EVERYONE! I hope that this post finds you all giving thanks and counting your blessings for all the great things in your lives! (and watching the Macy's Thanksgiving Day Parade! Wouldn't be Thanksgiving without it!) If you are looking for a last minute recipe to take to your gathering today, or just to make to munch on while you relax at home, then here is my all time favorite Thanksgiving food...The Pumpkin Pie. It just isn't Thanksgiving to me until I've had one piece covered in whipped cream! I've never actually made the pumpkin pie myself, I always left that up to my grandma growing up. After she passed, other family members would rotate bringing it each year, and it was most always a store boughten pie at that. Don't get me wrong, Sara Lee and Mrs. Smith can make one mean pie...but it's just not homemade, ya know? No prepackaged food is ever as good as homemade. So a few years ago, I took it upon myself to learn how to make my favorite Thanksgiving food (ever.) myself. I tried a new recipe this year, and I'm super happy with how it turned out! So the homemade pumpkin pie tradition will carry on!!


Ingredients...
...unbaked pie crust (9")
...3/4 cup white sugar
...1 tsp. cinnamon
...1/2 tsp. salt
...1/2 tsp. ground cloves
...1/4 tsp. ground ginger
...2 eggs
...1 can pumpkin puree (not pumpkin pie filling. That's what we're homemaking here. Just plain old pumpkin.)
...1 can evaporated milk

Directions...

In a small bowl stir together salt, cinnamon, ginger, cloves and sugar. In a large bowl, beat togehter eggs and then stir in pumpkin. Add sugar and spice mixture and stir until well combined. Gradually stir in the evaporated milk and stir until smooth. Pour into unbaked pie shell and bake at 425 for 15 minutes. Reduce oven heat to 350 and continue baking pie for an additional 40-50 minutes. To test for done-ness, insert a knife into the center of the pie. If it comes out clean, the pie is done. The filling will be ever so slightly jiggly yet, but will stiffen as it sits. Serve with whipped topping!

To see more last minute Thanksgiving recipes, check out the Ultimate Recipe Swap going on over at Life as Mom!
Related Posts with Thumbnails